How to Integrate OBD Data into Your App
How to Integrate OBD Data into Your App
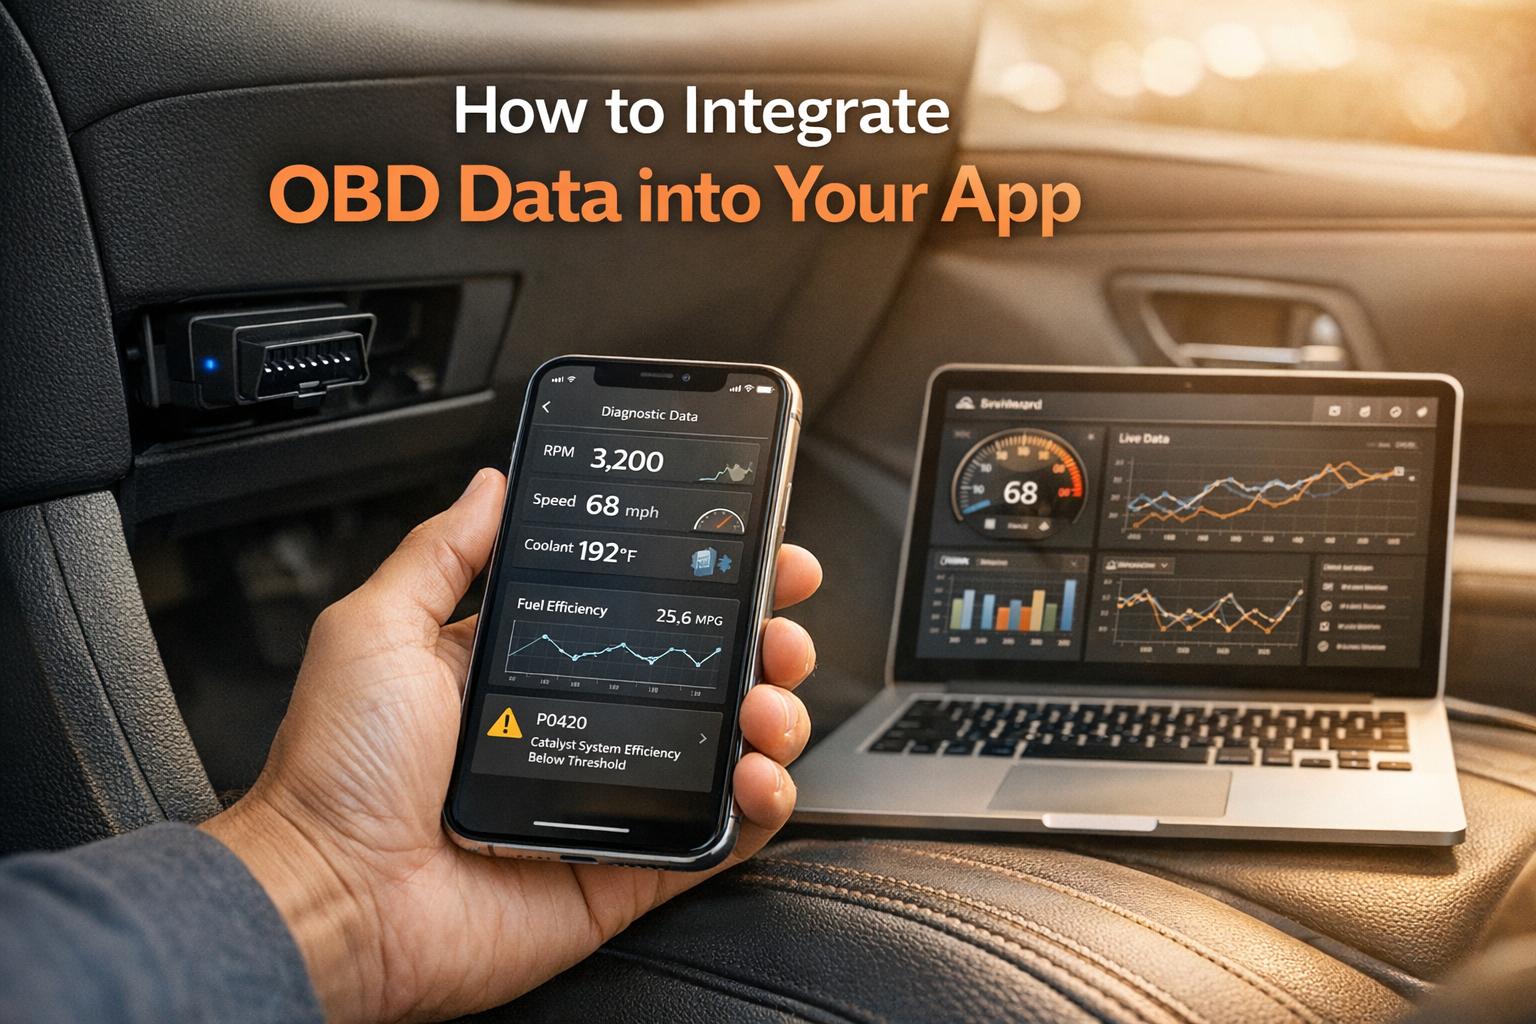
Want to turn your app into a powerful vehicle diagnostics tool? Integrating On-Board Diagnostics (OBD-II) data lets you monitor engine performance, detect issues early, and offer users valuable insights into their vehicle's health. Here’s how you can make it happen:
- Hardware: Use an ELM327-based adapter (Bluetooth, WiFi, or USB) to connect your app to a car’s OBD-II port. High-quality adapters like OBDLink MX+ ensure reliable communication.
- Software: Leverage APIs like CarsXE for decoding diagnostic trouble codes (DTCs) into clear, actionable descriptions. Use libraries such as
python-OBDor ObdMetrics for efficient data handling. - Data Retrieval: Send PID codes (e.g.,
010Cfor RPM) to request real-time vehicle data. Ensure smooth communication by verifying protocol compatibility and connection stability. - User Experience: Build clear dashboards to display key metrics like speed, RPM, and temperature. Add features like DTC decoding, repair suggestions, and data logging for long-term analysis.
- Optimization: Use caching to reduce API calls and implement error handling for connectivity issues or unsupported PIDs.
OBD-II Standards and Data Explained
What is OBD-II?
OBD-II, short for On-Board Diagnostics II, is a standardized system that connects to a vehicle's ECU (Engine Control Unit) to monitor its performance and diagnose issues. This system became mandatory for all light-duty vehicles sold in the United States starting in 1996, with medium-duty vehicles following in 2005 and heavy-duty vehicles by 2010. Using protocols like the Controller Area Network (CAN), OBD-II gathers data from various sensors and provides access through a 16-pin Data Link Connector (DLC).
This connector delivers a wealth of information, including real-time data, freeze-frame snapshots, and Diagnostic Trouble Codes (DTCs). Each DTC starts with a letter that identifies the affected system - P stands for Powertrain, B for Body, C for Chassis, and U for Network. The second digit of the code shows whether it’s a standard code (0) or manufacturer-specific (1). Grasping how OBD-II organizes and communicates this data is essential for anyone looking to interact with or troubleshoot a vehicle's systems.
PID Codes and AT Commands
To make sense of the data OBD-II provides, specific commands and identifiers are used to streamline communication with the vehicle. Two key tools in this process are PID codes (Parameter IDs) and AT commands (Attention Commands). Each serves a unique purpose.
- AT Commands: These are used to communicate directly with the OBD-II adapter, often an ELM327-based device. AT commands help initialize the adapter, set communication protocols, and retrieve basic information like firmware version or battery voltage. These commands work even if the vehicle's ignition is off.
- PID Codes: PID codes, defined under the SAE J1979 standard, are used to request specific diagnostic data from the vehicle. For example, PID 0C retrieves engine RPM, while PID 0D provides vehicle speed. OBD-II defines 10 diagnostic services, ranging from Service 01 (live data) to Service 0A (permanent DTCs). Communication follows a simple request-reply format: the app sends a command, the adapter queries the ECU, and the response - usually in raw hexadecimal - is decoded using specific formulas. For instance, engine RPM is calculated as
(256×A + B) / 4.
Before diving into diagnostics, it’s a good idea to use Service 01 PID 00 to check which PIDs the vehicle supports, as not all manufacturers implement every standard PID. Also, verifying the connection is key. An "ELM Connected" status confirms that the adapter is reachable, while "Car Connected" means the vehicle's ignition is on and the ECU is actively communicating. These steps ensure smooth data retrieval and accurate diagnostics.
What You Need Before Starting
Hardware Requirements
To integrate OBD data into your application, you'll need a reliable ELM327-based adapter. This device connects to your car's 16-pin OBD-II port and bridges communication between the vehicle's computer and your app. The right adapter depends on your platform:
- Bluetooth Classic Adapters: Ideal for Android and Windows applications, these provide stable wireless connectivity. For iOS, you'll need either a Bluetooth Low Energy (BLE) adapter or a WiFi-compatible device, as Apple restricts access to classic Bluetooth unless the adapter is "Made for iPhone" certified. The OBDLink MX+ is a great option, featuring Bluetooth 3.0 and Apple certification for compatibility across platforms. Some newer devices, like the vLinker MC+, include dual Bluetooth chips to support both Classic and BLE connections.
- WiFi Adapters: These create a local hotspot for your device to connect to, making them suitable for iOS. However, using a WiFi adapter means you won't be able to access other WiFi services while it's active.
- USB Connections: USB offers the most stable connection for Windows and macOS desktop applications but isn't supported by mobile apps. Basic USB scanners start at just $4.50, while premium models like the OBDLink MX+ or OBDLink CX cost more.
It's important to invest in quality hardware. Cheaper clones often use inferior components that can lead to unreliable communication. Look for adapters that support multiple OBD-II protocols - such as ISO9141, J1850 VPW, J1850 PWM, and CAN - and feature low-power modes to avoid draining your car's battery when left plugged in. These factors will directly impact the ease of setup and the performance of your integration.
Once you've selected the right hardware, the next step is choosing the appropriate software libraries to decode and manage vehicle data.
Software Libraries and APIs
For software, ObdMetrics stands out as a robust Java framework tailored for ELM327 and STNxxxx adapters. It uses JSON files for PID definitions, supports dynamic formula evaluation with JavaScript, and achieves an 80% code coverage ratio, ensuring reliability. The framework can batch up to 6 PIDs in a single Mode 01 call and up to 11 PIDs for Mode 22, speeding up data retrieval significantly. It's a solid choice for building vehicle diagnostics applications.
When it comes to decoding diagnostic trouble codes (DTCs), the CarsXE OBD Codes Decoder API simplifies the process. This API translates raw DTCs like "P0115" into readable descriptions and diagnostic insights. It eliminates the need to maintain your own code database and ensures your app stays updated with the latest vehicle diagnostics. CarsXE offers SDKs for popular programming languages, including Python, Java, Node.js, PHP, Go, .NET, Ruby, and Swift, making integration seamless across different environments. To keep your app secure, store API credentials in environment variables instead of embedding them directly in your code.
With the right hardware and software tools in hand, you're ready to begin integrating OBD data into your application.
How to Use ELM 327 Bluetooth OBDII Scanner Step By Step
How to Integrate OBD Data: Step-by-Step
OBD-II Data Integration Process: 3 Steps from Connection to Data Retrieval
Step 1: Connect to the OBD-II Adapter
Start by pairing your Bluetooth adapter at the operating system (OS) level before your app tries to communicate with it. Skipping this step can lead to "connection error" messages when your code attempts to reach the device. Tools like python-OBD can automatically scan Bluetooth and USB ports, but you can also manually specify the device file (e.g., /dev/ttyUSB0 for UNIX or a COM port for Windows).
The connection process moves through four stages: Not Connected (no serial link established), ELM Connected (adapter detected), OBD Connected (adapter linked to the vehicle but ignition off), and Car Connected (full communication with the vehicle, ignition on). To avoid hardcoding, use utility functions like obd.scan_serial() to find available ports. If you're using a Raspberry Pi with a Bluetooth adapter, set fast=False and adjust the timeout to 30 seconds. On Linux systems, make sure to install bluetooth, bluez-utils, and blueman to prepare your Bluetooth stack.
Once the connection is stable, proceed to initialize the adapter.
Step 2: Initialize the Adapter with AT Commands
After establishing a connection, use AT commands to get the adapter ready for data retrieval. Start with AT SP 0 to enable automatic protocol detection, and then confirm the selected protocol using AT DP. Commands like AT I can provide firmware details, while AT RV checks the vehicle’s voltage (around 12V is normal; anything below 6V suggests a disconnection).
If your adapter supports low-power mode, send a space character before setting the baud rate to wake up the ELM327 chip. Once the protocol is set, test the connection by sending a basic PID request like 010C (RPM). During this process, the adapter may display "SEARCHING..." as it identifies the correct protocol for your vehicle. For Bluetooth setups prone to interference, disabling "fast" mode can improve reliability.
With the adapter fully initialized, you're ready to start retrieving vehicle data.
Step 3: Retrieve Vehicle Data Using PID Codes
OBD-II communication operates on a request-and-reply system. Your app sends a PID (Parameter ID) code, and the vehicle’s ECU responds with the requested data. Mode 01 retrieves real-time sensor data, such as RPM (010C), speed (010D), coolant temperature (0105), and throttle position (0111). For diagnostic tasks, Mode 03 fetches Diagnostic Trouble Codes (DTCs), while Mode 04 clears them. Many modern libraries simplify this process, allowing you to use high-level commands like obd.commands.RPM instead of manually sending raw hex codes like 010C.
Before making data requests, confirm that the PIDs are supported by the vehicle. This can be done using PIDs like 00, 20, 40, or 60, or through a supports() function in your library. Always check response.is_null() to prevent crashes when handling unsupported PIDs. For real-time monitoring, implement polling at intervals, such as every 1,000 milliseconds. Libraries that include unit conversion features make it easy to display data in familiar formats, such as Fahrenheit for temperature or MPH for speed. Keep in mind that the ignition must be on (status: CAR_CONNECTED) to retrieve Mode 01 data, as some adapters can respond with the engine off but won’t provide sensor readings.
Once you've retrieved the data, you're ready to move on to integrating it into dashboards or other applications in the next steps.
sbb-itb-9525efd
Using CarsXE API for OBD Data
With raw vehicle data at your fingertips, the CarsXE API helps turn those cryptic codes into meaningful, actionable insights.
Why Use CarsXE API
Once you've pulled Diagnostic Trouble Codes (DTCs) from a vehicle's ECU, you're often left with codes like P0420 or P0301 that don't mean much on their own. The CarsXE OBD Codes Decoder API simplifies this by translating those codes into plain, easy-to-understand descriptions. For example, a code like P0420 becomes "Catalyst System Efficiency Below Threshold", complete with likely causes, severity levels, and even estimated repair costs in USD. This eliminates the hassle of maintaining your own database of over 3,000 OBD codes.
The API is designed for global use, supporting data from over 50 countries while adhering to U.S. standards like imperial measurements, Fahrenheit, and dollar-based pricing. Beyond decoding DTCs, CarsXE also offers features like recall lookups, VIN decoding, and vehicle history reports - all accessible through a single, user-friendly dashboard. This setup saves you from juggling multiple data sources or relying on outdated code lists.
"The API is easy to work with; its documentation and result sets are reliable." - Senior Director of Engineering, Major Parking App
Adding CarsXE API to Your App
To get started, head over to CarsXE.com and sign up for an API key via the Profile dashboard. Once you’ve added a payment method, your key will be activated (a free Sandbox tier with up to 100 free API calls is available for select APIs). For security, store your key in an environment variable, like a .env file.
Next, install an HTTP client library that works with your platform. For example, use Retrofit for Android, Alamofire for iOS, or one of the official SDKs for languages like Python, Node.js, PHP, Go, Java, .NET, Ruby, or Swift. Then, send a GET request to https://api.carsxe.com/obdcodesdecoder with your key and the code (e.g., "P0301"). The API will return a JSON response, including a diagnosis string, the request date, and a success flag. You can parse this response and integrate it into your app's dashboard right after a Bluetooth OBD scan.
Be sure to implement error handling for HTTP codes like 400, 401, and 429 to ensure a smooth user experience. This approach is far more dependable than dealing with Bluetooth connection issues or manually parsing PID responses. Once integrated, your app can deliver clear diagnostic results and repair suggestions directly to users, enhancing their experience and trust in your platform.
Displaying and Managing OBD Data
Building Clear Dashboards
When presenting OBD data, simplicity and clarity are key. Focus on the most essential signals, such as Mass Air Flow (MAF), NOx levels, throttle position, and RPM - these provide a solid foundation for general monitoring. To make the data more actionable, consider using contextualized ratios like NOx per MAF, which can quickly show whether a vehicle is operating within a healthy range.
It's also important to include clear connection status indicators to help users identify and resolve connectivity issues. For smooth performance, aim for a sampling rate of 2 Hz (one sample every 500 ms). This rate is sufficient to monitor key activities like idling, acceleration, and deceleration. To minimize latency, implement "Fast Mode" optimizations, such as sending carriage returns to repeat commands or appending response limits. For diagnostic dashboards, calculate short-window averages and slopes for critical sensors to help users detect sudden performance changes.
Once the dashboard is optimized, robust data logging becomes the next step in enhancing analysis and troubleshooting.
Logging and Analyzing Data
Efficient logging requires capturing both raw and decoded data, paired with precise timestamps. This approach allows for re-parsing if decoding logic needs to be updated later. Logs should be organized in formats like CSV or structured trace files, with a dedicated time column (measured in milliseconds). Adding labels to logs, such as "healthy" or "unhealthy", makes it easier to diagnose issues.
For deeper analysis, use sliding windows to break data into overlapping segments. For instance, a 3,000 ms window with a 1,500 ms step can help identify short-lived issues, such as misfires or sensor biases, that might be missed in single-point readings. Beyond raw PIDs, calculate and log derived features like NOx / MAF or MAF / RPM. These ratios can highlight mechanical problems when values deviate from expected ranges. To reduce redundant API calls, cache static vehicle information (e.g., VIN specifications) using a Time-To-Live (TTL) strategy - set general data to refresh every hour and specifications every 24 hours.
Performance Optimization and Error Handling
Faster Data Retrieval
To ensure your UI remains responsive while handling real-time data, rely on asynchronous connections. Many OBD libraries have a default delay of 0.25 seconds between command loops, but you can speed things up by setting delay_cmds to 0. This allows for continuous and high-speed data retrieval.
You can further enhance efficiency by creating a "watch" list for specific PIDs (Parameter IDs). This approach uses a background thread to refresh only the essential commands, giving you instant access to critical data. For information that changes infrequently - like VIN specifications - implement intelligent caching with a Time-To-Live (TTL) system. For example, refresh general data every hour and VIN specifications every 24 hours to reduce unnecessary API calls.
Keep in mind that API rate limits often fall between 5 and 50 requests per second. To avoid disruptions from HTTP 429 errors, use exponential backoff strategies. Start with a 1-second delay, then double it to 2 seconds, and so on, ensuring system stability .
These optimizations not only enhance speed but also lay a solid foundation for tackling potential errors.
Troubleshooting Common Errors
Once performance is optimized, the next step is to address common connectivity and data retrieval issues. Connectivity errors tend to be frequent in OBD integrations. To resolve them, monitor connection states and manage empty responses effectively. Use the connection states (NOT_CONNECTED, ELM_CONNECTED, OBD_CONNECTED, CAR_CONNECTED) as a guide for diagnosing problems.
For handling empty responses, always include is_null() checks in your code. If you're using Bluetooth adapters, especially on platforms like Raspberry Pi, connection drops can be a recurring issue. To improve stability, disable "fast" mode by setting fast=False and increase the timeout to 30 seconds. Additionally, if you encounter "Not Connected" errors despite proper setup, consider disabling the check_voltage feature. Some adapters lack support for the voltage pin or depend on switched ignition voltage, which can trigger such errors.
Conclusion
Integrating OBD data into your app opens the door to real-time diagnostics and practical insights that can elevate the driving experience. By following the steps in this guide - connecting to OBD-II adapters, retrieving PID codes, optimizing performance, and managing errors - you can create applications capable of delivering instant fault detection, automating service schedules, and interpreting complex vehicle data effectively.
CarsXE simplifies this process with a unified API that translates diagnostic codes (like P0115) into easy-to-understand insights. With SDKs available for popular programming languages like Python, Java, and Node.js, you can integrate vehicle data quickly and efficiently using the tools you’re already familiar with. This seamless setup makes it easier to tap into CarsXE's capabilities for decoding and enriching your data.
Always remember to safeguard your API credentials and implement robust error handling for common issues like HTTP 400, 401, and 429 errors. Combining real-time data with historical trends can also help you identify patterns over time, improving predictive accuracy and vehicle monitoring.
Whether you're developing a fleet management tool or an app for monitoring personal vehicle health, integrating OBD data lays the groundwork for smarter, more responsive applications. With the right tools and strategies, you can transform raw vehicle data into insights that keep drivers informed and vehicles operating at their best.
FAQs
What are the benefits of integrating OBD data into an app?
Integrating OBD (On-Board Diagnostics) data into an app can open up a world of possibilities for both everyday users and businesses. For individual users, it means having real-time access to their vehicle's health. Think about it - insights into potential problems, maintenance schedules, and overall performance are right at your fingertips. This kind of information can help prevent surprises on the road, improve safety, and even save money by catching issues before they escalate.
On the business side, industries like fleet management or car dealerships can benefit immensely. OBD data makes vehicle diagnostics simpler, helps keep track of inventory, and ensures compliance with regulations. Plus, apps can offer tailored features like maintenance alerts or driving behavior insights, which not only streamline operations but also keep users engaged and satisfied.
By incorporating OBD data, apps can go beyond basic functionality, improving vehicle reliability and unlocking smarter, more efficient features that cater to the specific needs of both users and businesses.
How can I choose the best OBD-II adapter for my app?
When choosing an OBD-II adapter for your app, focus on compatibility, functionality, and reliability. First, confirm that the adapter is compatible with your vehicle and supports the connection type you need - whether that’s Bluetooth or Wi-Fi - for smooth integration. It’s also crucial to ensure the adapter works with the APIs and tools your app relies on, such as real-time data access or OBD code diagnostics.
Opt for an adapter that delivers stable and accurate data transmission. A dependable device ensures your app runs smoothly and provides precise insights into vehicle health. By keeping these factors in mind, you can select an adapter that not only fits your app’s requirements but also integrates seamlessly with your platform.
What are PID codes, and why are they essential for integrating OBD data?
PID codes, short for Parameter IDs, are standardized identifiers that allow developers to pull specific diagnostic data from a vehicle's onboard computer. These codes are a key element in OBD (On-Board Diagnostics) systems, providing access to detailed information about the vehicle's condition - like engine temperature, RPM, fuel pressure, and much more.
Using PID codes, your app can tap into real-time data about how a vehicle is performing. This makes them indispensable for building features like vehicle diagnostics or health monitoring, giving users valuable insights into their car's status.
Related Blog Posts
- How to Integrate Vehicle Data API in 5 Steps
- How Real-Time VIN Decoding APIs Work
- How to Integrate OBD Data with Cloud Platforms
- How OBD Data Powers Predictive Analytics